One Pavlova - Two Ways

In the recent edition of the My Little Jedi Magazine Jacki from Blissfully Sweet Cakes and I decided to create this delicious Pavlova two different ways - one for easy presentation on your table and the other to use as a great take home Christmas favour.


First up is the Pavolva Tree - this is honestly so easy to put together as I took these photo's of Jacki creating her tree in about 1 minute flat - she just kept layering it with all the delicious components and it worked a treat. Here are some photos showing just how simple it is to put together.


The second version of this wonderful dessert is a Pavlova in a jar. Great for take home gifts or a cute way to serve your guests at the party. As with the tree you just layer the components on top of one another, close the lid and tie on a cute tag. Yum!
Jacki's recipe and instructions are below.


Nutty Chocolate Pavlova Tree Recipe
Find your favorite Pavlova recipe, or use the one below, and made a few quick and easy changes to the way it is put together and you have a Pavlova Tree or a Pavlova in a jar – great to serve on Christmas day and for party favours for your guests.
You will need:-
6 egg whites (room temperature)

330 gms caster sugar
1 tbs cornflour
1 tsp balsamic vinegar
25gms cocoa powder
6 Ferrero chocolates, crushed
600mls thickened cream

1 vanilla bean, scraped
1/3 cup icing sugar
Pistacchio nuts, hulled and crushed
Punnet of blueberries


1. Preheat oven to 140°C. Line 2 baking trays with baking paper.
2. Using an electric mixer, beat eggwhites in a large bowl until soft peaks form. Gradually add in the caster sugar. Continue beating until meringue is thick and glossy, about 5-7 minutes. Sift cocoa powder into meringue and fold in the crushed ferrero chocolates.
3. If making the pavlova tree, spoon the meringue mixture into rounds on your baking paper using different sizes circles. This will achieve the Christmas tree cone shape. Make as many rounds as you like and make the tree as high or wide as you like.
4. Put the trays in the oven and immediately lower the temperature to 120°C. Depending in the size of your shells the cooking time will take between 1 and 1½ hours. Keep checking. The shells will be ready when the surfaces are hard. Turn the oven off and leave the door ajar until the oven is cooled.
5. To make chantilly cream, beat thickened cream together with the scraped vanilla bean and icing sugar until stiff peaks are achieved.
6. To assemble, get your favourite cake stand or plate and place a small blob of cream on the stand and start layering the pavlova shells, with the larger circles on the bottom and work your way up. In between each layer, pipe the chantilly cream with sprinkle with the pistachio nuts and blueberries. Top the tree with a swirl of cream and a luscious blueberry.
7. Serve and enjoy!


Recipe by Blissfully Sweet
Jars, Printables and cake stand Sweet Style
Photography Sweet Style


Leanne

wordless wednesday : Mother & Son

wow it's wednesday again! thanks for being here & playing along. {if you are new here all  you need to do is add your wordless blog post to the list. link back to here & enjoy getting to know some new bloggers}

Samsung G Series Three Door Refrigerator Review

Samsung G Series Three Door Refrigerator
I was recently asked if I would like to review a G Series Three Door Refrigerator from Samsung but having recently fitted a new kitchen into my home, as much as I loved the idea of this refrigerator, there was no way it would fit in my kitchen. On the other hand, my recently engaged little sister and her fiance are renovating their new home.

I immediately went and checked out this cool sounding refrigerator on Samsung's website. It looked so shiny, stylish and chic, boasted so much space inside and to top it all it had an ice maker! I thought it would look great in their kitchen! After ringing my excited sister, they checked over their kitchen plans and after taking the measurements into consideration they agreed it would be a perfect fit. It would also come in very handy as I'm chief wedding planner and will need plenty of space to store all the sweet treats myself and their friends and family are making for their special day.

So this past weekend I went down to visit her and her fiance in Devon. We spent Saturday trying out recipes I would like to make for my Christmas dessert table (recipes coming soon!) and planning out ideas for her wedding, which I will be sharing with you here over the next year!

We thought this was a great opportunity to put their shiny, sleek new refrigerator through its paces. My sister and I made panna cotta, gluten free key lime pie and chocolate mousse in mini glass jars, and chocolate raspberry cupcakes. All of the items easily fitted on the shelves and we didn't get in each other's way as we moved things in and out of the refrigerator due to the huge opening. The storage space is amazing due to the thin wall insulation technology which gives you extra space inside. As the desserts set we played about with the height adjustable balconies inside the door and everything fitted so well, from the tall bottles of soda to the mini milk bottles and the clever can dispenser that you can angle for easy can removal.

We loved the G Series Three Door Refrigerator. Not only does it look fabulous but Samsung have really pulled out all the stops. With its LED lighting it makes even the corners bright! It is roomy and can be configured in so many ways by using the foldable, flippable and slide out shelves. It has two fresh-safe, large vegetable drawers that provide the optimal humidity level to preserve vitamins and nutrients in fruits and vegetables. The water and ice dispenser is state of the art and provides continuous filtered water and crushed or cubed ice at the touch of a button. The water and ice dispenser is also tall enough to fill jugs and has its own lighting. The healthy water filter system ensures that water and ice from the refrigerator will always be clean and fresh.


Thank you Samsung, we love it!


Samsung G Series Three Door Refrigerator
Raspberry & Lemon soda
Samsung G Series Three Door Refrigerator
Strawberry Milk
Cocktails

Have a sweet day!

That Every Kid In the Class thing: part 2


So, last year I was stunned to discover a series of crumpled Christmas cards at the bottom of Maxi's school bag. "Oh no! They're doing a card for every kid in the class?!" I panicked. I then went a bit crazy to make up for not being the first one out with the Christmas cards. As you do.

Which of course means that my panicked reaction has set the bar and this year the little faces were saying "what are we giving to every kid in the class this year, Oh Mum Who Should Know Better?"

So I stole this idea from Zoe at A Personal Touch via Pinterest and on the weekend we took breaks from decking the halls to fill bags with reindeer noses. As you do. We were like a little conveyor belt, churning out reindeer noses. Putting the kids to work was immensely satisfying.


There is a little personal Christmas message on the back of each label for each child. I started delicately clipping love heart holes and gently tying each label on with ribbon, but I was totally over that $%#@# fiddly job by about bag 12 so out came the stapler, snap, snap, snap. Is it wrong to, um, choose the kids who would get the special-ribbon noses?

Regardless, to say these little bags of festive cheer were a hit with the kids would be an understatement.

What are you doing for every kid in the class this year?*

* Please, please say "a card" or "what are you, crazy, you stupid woman, I'm doing absolutely nothing. NOTHING."


____________________________________________________________


If you want to make your own reindeer labels, you can download the ones I made here. And I ordered my bags here. Have fun!

Teacher Presents.... Done.

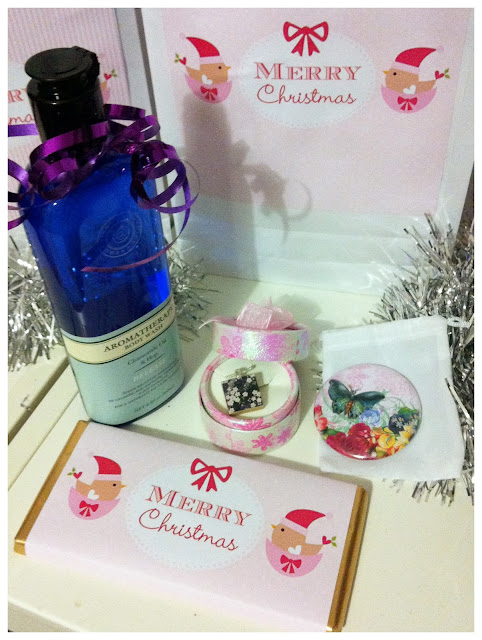
Yay! Finally put together Louise's teacher presents. I really wanted them to be special this year as Lou is moving on to big girl kinder next year, she has also finshed up at her dancing class which she has just adored this year, so lots of sad goodbyes coming soon. 


 If your looking for really lovely gifts and very reasonable prices you must check out what Iszle has - there are so many styles and choices - and I thought just a little different. 
I picked Scrabble tile necklaces and Pocket mirrors this year. I also made up some pretty chocolates using a PDF file I purchased from Fairydust Stylish Stationary. Toni is the invite design queen!! You must check out her birthday printables, they are gorgeous.
(I may or may have not already purchased Evie's first birthday set) 
YES! I know she is only 8mths but I do like to prepare these things nice and early and the planning has already started.


Here is a sneak peak of the back - my favourite bit :)
~Please excuse the crappy nightime iphone photos~


Have you done your teacher pressies yet? I'd love to know what your getting or making this year!!